Wednesday, March 9, 2022

Conserving pieces of the history of Uncle Tom's Cabin


Conserving pieces of the history of Uncle Tom's Cabin

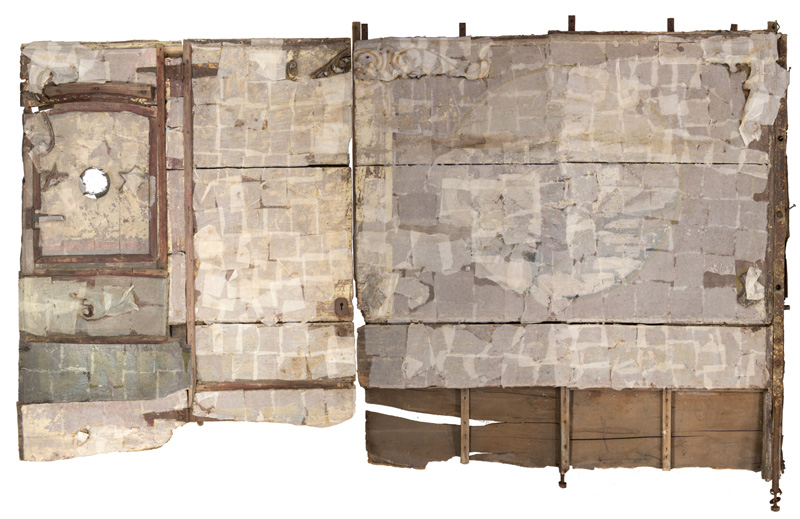
During my time at the museum’s object conservation lab, I discovered that a set of painted panels in the museum’s collection had quite a history—most of it hidden from view. The panels are the remaining pieces of a wagon built for a traveling show of Uncle Tom’s Cabin in the early 1900s.

In searching to understand the history of this object and the story it can tell, I learned that these panels illuminate both a specific type of entertainment—traveling wagon shows—and the larger story of how white supremacy and racism have shaped American entertainment culture.

A best-selling novel of the 1800s, Harriet Beecher Stowe’s Uncle Tom’s Cabin exposed readers to the horrors of enslavement in the United States and preached abolition. Shortly after it was published, the novel was adapted into a variety of minstrel-style shows featuring blackface performers, with messages that were antithetical to Stowe’s original story. These minstrel productions of Uncle Tom’s Cabin, today known as “Tom Shows,” changed the narrative of Stowe's original work and portrayed the novel's tragic characters in a racist, degrading, and comedic style. Tom Shows were very popular in the United States in the 1800s, and they continued to permeate American storytelling in the following century through silent films, popular cartoons, and dramatic films.

Wagon panels with faded artwork advertising a traveling production of Uncle Tom’s Cabin, leaning against a wall outside a building
Wagon panels on collection site, around 1983

For these wagon panels, the big unknown was if the narrative would actually be legible. The panels were acquired by the museum in the 1980s. At that time, a conservator covered the painted surface with small pieces of tissue, using a weak adhesive. This process is called facing, and it is a common practice in conservation when a layer of media is in danger of detaching. The facing allowed the panels to be safely transported from a barn in Vermont to secure storage at the museum.

Practices and standards in art conservation have evolved over the years as available technologies have advanced. In the 1980s, museum staff wrote a report on the state of the wagon panels and took a small number of film photographs. Nearly 40 years later, conservators are expected to provide a much more thorough level of documentation. In addition to multiple standardized photographic methods, conservators fastidiously record any materials and methods used within their object treatments. Before my treatment began, I took high resolution digital photographs of each panel and compiled them in the arrangment of the historic photograph that you see below. Because our team did not know what kind of facing adhesive was used for the panels’ treatment in the 1980s, we started our work by testing methods to soften the mystery material.

Wagon panels almost completly covered with small squares of facing tissue
Digital composite image of panels, before treatment (1986.0180.01-.07)

Historically and today, when conservators apply facing tissue, they use an adhesive that can be easily removed without damaging the surface of an artifact. However, as materials age and interact with the environment, their physical properties change. In the case of the panels, the facing adhesive became harder to remove with age. Through testing, we discovered that the adhesive used on the panels responded to water, softening as it was moistened. Unfortunately, the paint layer also responded to water, which could lead to more loss. Testing different methods to apply water through a barrier or with a thickener proved effective and safe for the paint layer below.

Conservator working behind the scenes at the museum, carefully removing tissue from the wagon panels
Removing the facing, photo courtesy of Christy Sweet

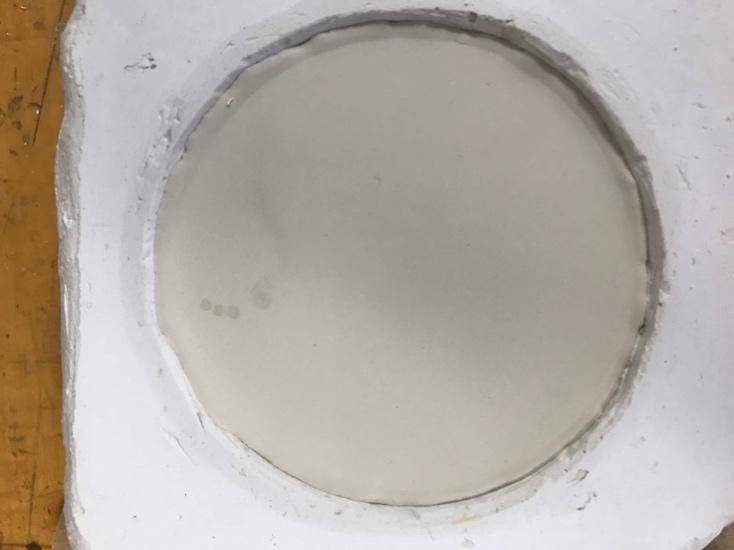
By brushing on a thick cellulose ether mixture—a material similar to the one we think was used in the 1980s—I was able to reactivate the adhesive for a short window of time and safely peel it back without damaging the paint layer. (You can see what this process looked like in the image above.) As I removed the tissue, I found many loose paint flakes. Moving slowly across the large surface, I was able to secure these fragments with a reversible yet strong adhesive, keeping them in their original placement.

As each small piece of facing tissue was removed, our team was able to slowly reveal more and more of the imagery on the panel. One of the first discoveries we made was painted hounds (visible in the photo below), which confirmed that the wagon’s panels illustrated the scene from Uncle Tom’s Cabin where Eliza Harris and her child flee across the frozen Ohio River toward freedom.

Two images showing the before and after affects of conservation on one part of the panel's artwork, showing a yello cartoon dog posed mid-leap
The painted hound dog on the panel during facing removal (above) and during cleaning (below)

Eventually, I removed every piece of tissue on the panels. The photographs from the barn location show approximately the same amount of loss as is present today. Years of use, and sun and water damage, have caused signifcant paint loss. But the facing saved what paint was left on these panels when they were collected by the museum.

After the facing was removed, I completed additional steps of cleaning and consolidating the panel’s painted surface. The image of the panels below, taken during the treatment process, not only shows the painted scene of Eliza on the ice (seen in the lithograph from the museum's collection below), but also what is left of the advertising lettering on the panels. Although my internship came to a close, these large and complex objects are still undergoing aesthetic and structural treatment at the museum to ensure their safe display and longevity.

Lithograph depicting a scene  of Uncle Tom’s Cabin, showing the character Elize carrying her child over the frozen Ohio River. The ice cracks beneath Eliza's feet as she runs across, while small figures watch her progress from the far shore in Kentucky
Lithograph from a publication of Uncle Tom’s Cabin illustrating ”Perilous Escape of Eliza and Child.” (DL.60.2373)

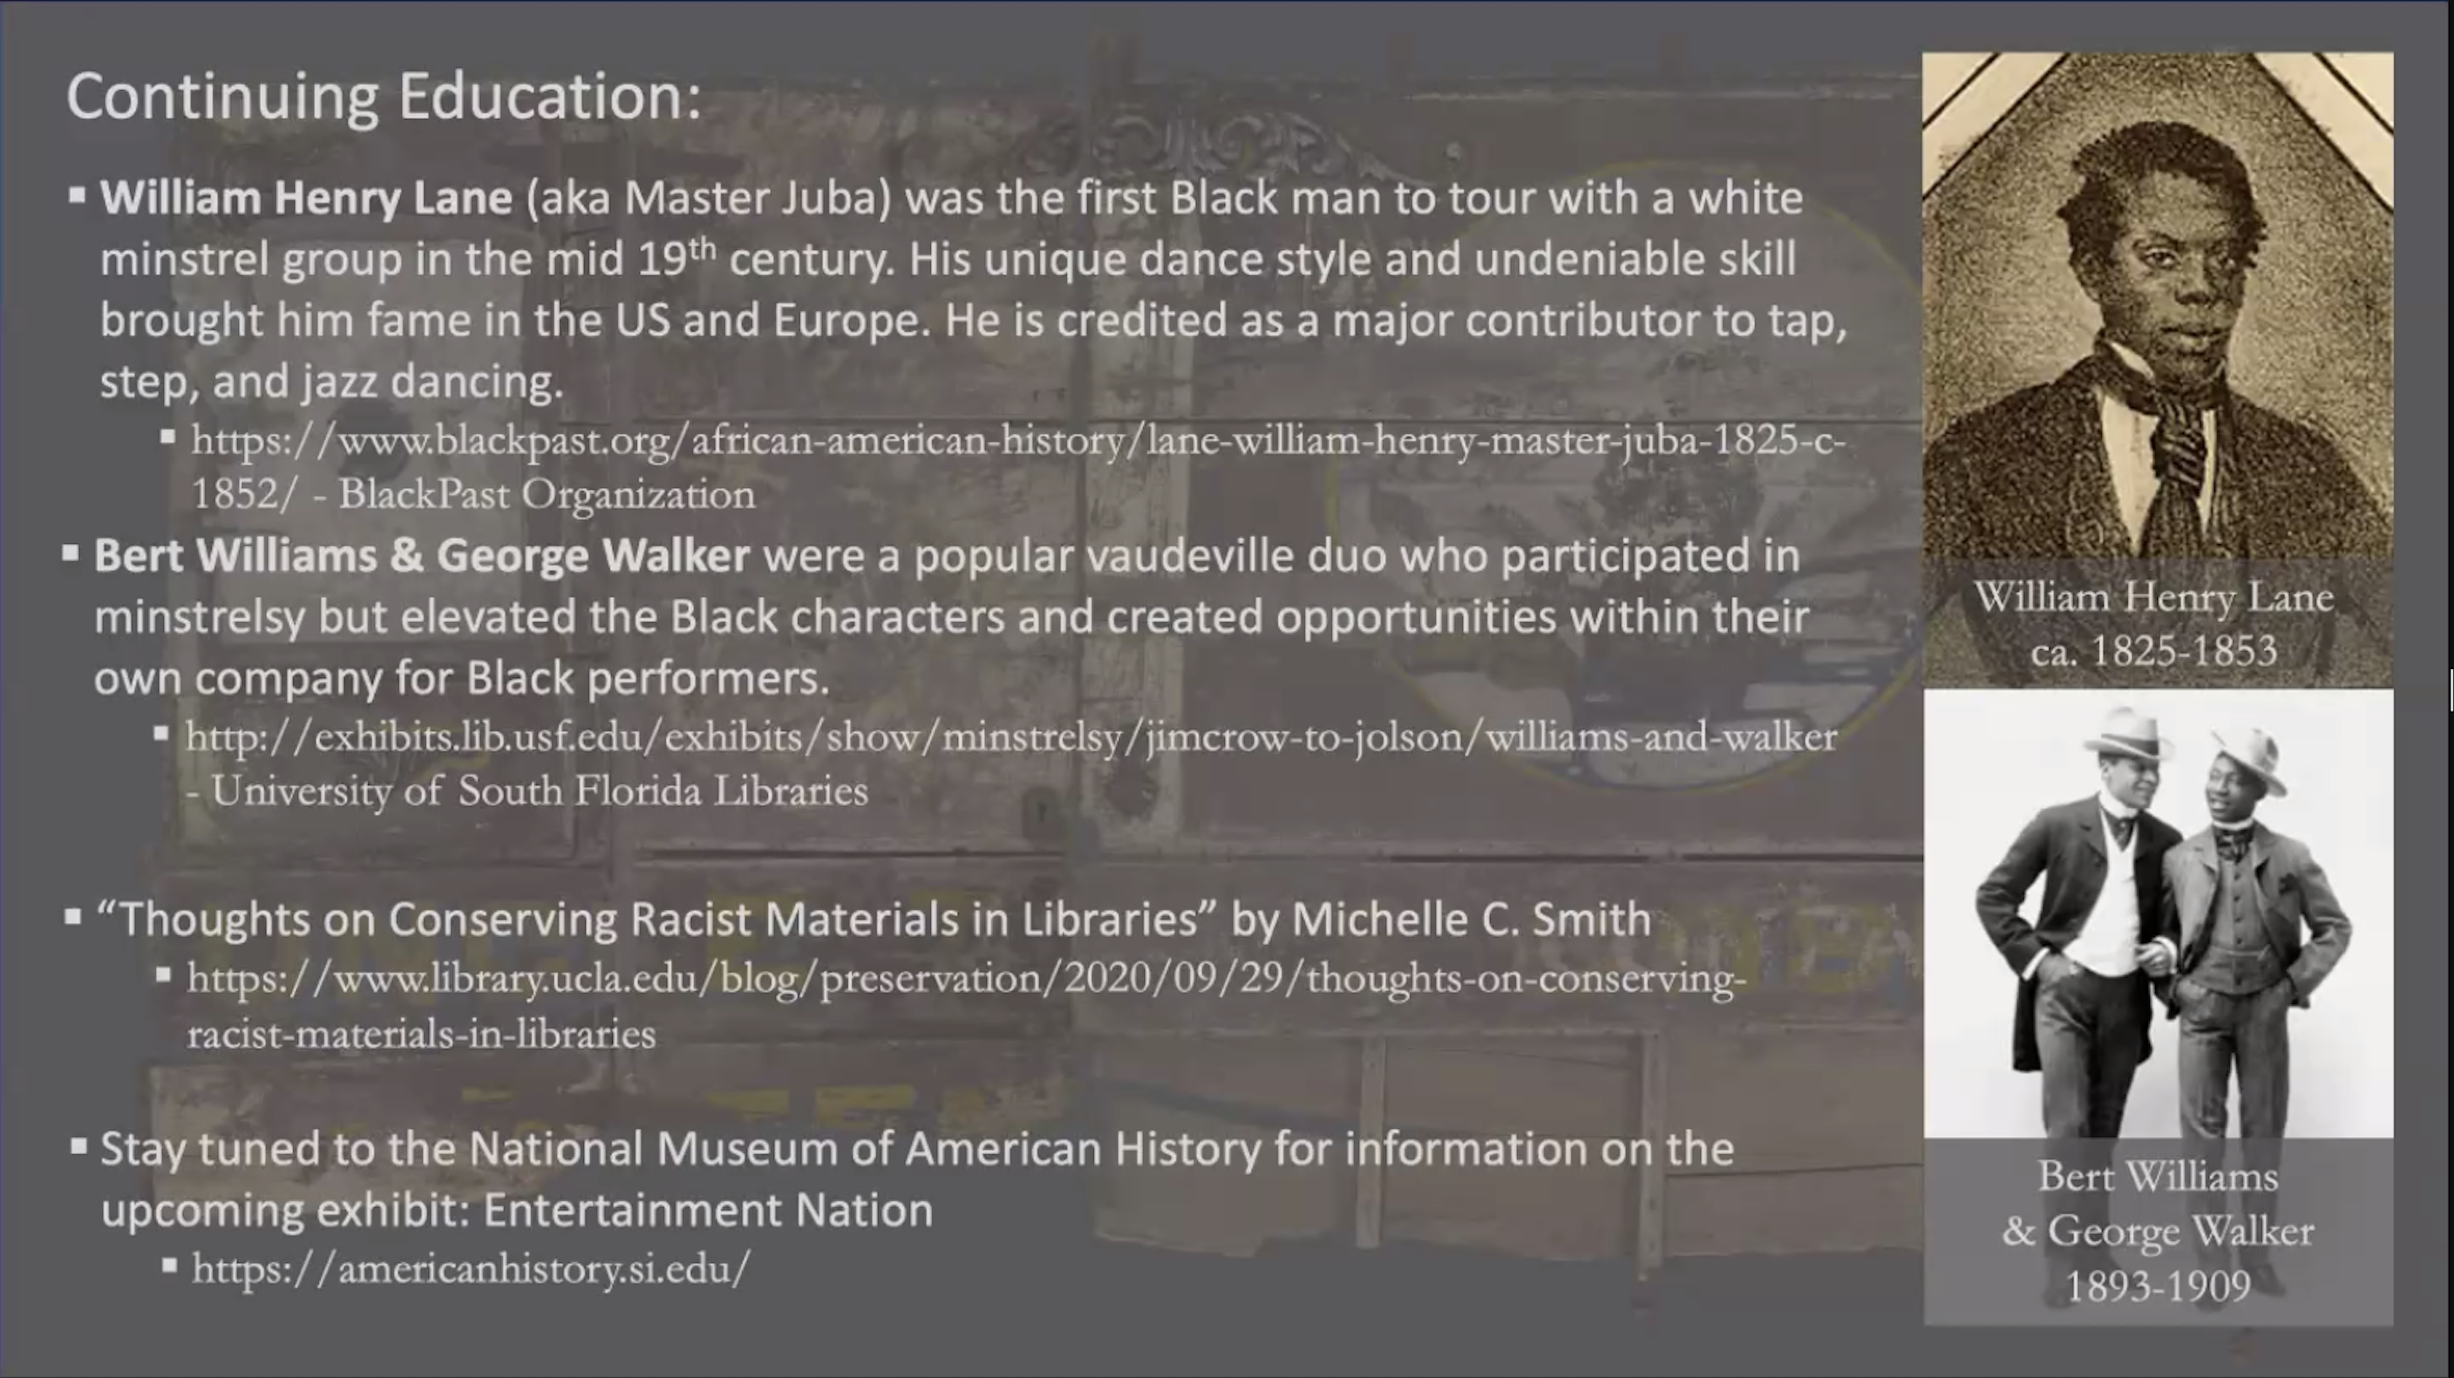
Art conservators have the opportunity to look up close at materials with the aid of microscopes and scientific analysis while spending time with objects as a whole. We witness the story that the object tells as we observe, test, analyze, and repair. I was fortunate to learn so much from this object, and because of this treatment, the panels can continue to tell their story to a broader audience. These panels will be part of an upcoming exhibition at the museum, Entertainment Nation, which will explore the history and evolution of entertainment in the United States. When displayed alongside thorough interpretation, cultural heritage objects like these panels are powerful representations of a past we cannot ignore.

Wagon panels after conservation. The panel;s decoations include oa large piece of art, depicting the scene of Eliza and her child fleeing across the Ohio River, pursued by leaping dogs. Also visible are the words, printed in large yellow and blue font, “U
Digital composite image of panels, during treatment. Note the remains of the words “Uncle Tom’s Cabin Tent Show” spanning the panels. (1986.0180.01-.07)

Stephanie Guidera is a third-year Graduate Fellow at the Patricia H. and Richard E. Garman Art Conservation Department at SUNY Buffalo State College. In Fall 2020, she was an intern in the museum’s object conservation lab. She writes this blog with immense gratitude for the Preservation Services department, specifically to supervisor Dawn Wallace and Scott Nolley for their guidance and faith, to Ryan Lintelman and John Troutman for their expertise and involvement, and to the Beth Richwine Fund and the museum for the financial support.

Reposted from: https://americanhistory.si.edu/blog/conserving-pieces-uncle-toms-cabin

Meeting Summary: “Facing Our Past: Conservation Treatment of a Theatrical Wagon Panel”

Meeting Summary: “Facing Our Past: Conservation Treatment of a Theatrical Wagon Panel”


“Facing Our Past: Conservation Treatment of a Theatrical Wagon Panel”  talk by:
Stephanie Guidera, Graduate Fellow at the National Museum of American History

Summary by: Emma Kimmel, Graduate Intern in the Department of Painting Conservation at the National Gallery of Art

Content Warning: The following passage describes racist literature and practices.

As part of the WCG’s Intern and Fellow Talks hosted on Zoom, Steph Guidera presented her treatment of a painted panel from a theatrical wagon housed at the National Museum of American History (NMAH). Her presentation not only detailed aspects of her treatment, but also provided context for the wagon panel’s use as part of a traveling minstrel show that was popular during the 19th century.

Guidera, after a land acknowledgement and statement of support for the Black Lives Matter movement, began her presentation by providing background for the wagon panel’s use. This panel is one of five from NMAH’s collection which detail different scenes from Harriet Beecher Stowe’s Uncle Tom’s Cabin, a best-selling novel from the 19th century that aimed to educate Northerner’s about the South and to humanize slaves. Although the problematic stereotyping and white saviorism of Stowe’s novel is obvious to modern readers, at the time the book was hugely popular throughout the United States. Due to its popularity, there were numerous productions of Uncle Tom’s Cabin, known as “Tom Shows,” running throughout the U.S.; in New England alone there were about 400-500 productions running between the 1850s-1930s. These performances were part of a larger trend of racist minstrel shows common at the time where predominately white people wore blackface to play the role of black people. The wagon panels owned by NMAH would have been part of a traveling performance of Uncle Tom’s Cabin, and used to transport actors and set pieces to different locations.

In the 1980s, shortly after their acquisition by NMAH, the panels were faced with tissue which totally obscured the underlying painted designs. Guidera’s first task was to remove this facing; although the facing adhesive was soluble in water, some of the binder in the fragile paint was water sensitive. After trying several different methods of removal, she decided to remove the facing using 5% Klucel G in ethanol. Any paint fragments that came up with the facing were consolidated and readhered to the panel with 10% Aquazol 500 in ethanol.

Once the facing was removed, the central image became more legible – a scene from Uncle Tom’s Cabin depicting one of the main characters Eliza running across the ice. Descriptive text “Uncle Tom’s Cabin.” and “___ Company” could also be read more clearly. However, removing the facing also revealed further condition issues: the full extent of loss throughout the design, and how little binder remained in the surviving paint layers. There was also significant dirt and debris, but this could not be addressed until the paint was adequately consolidated. 10% Aquazol 500 in ethanol was used to consolidate individual paint fragments, whereas a 5% solution was applied overall to areas with loose paint. Even after this local consolidation, the paint was so poorly bound that it was easily dislodged with light pressure, or would crumble to powder. Cleaning, therefore, was done selectively to those pigments stable enough. The most successful cleaning method Guidera tested was to clean the surface with cotton swabs using 3% triammonium citrate at pH 8, cleared with deionized water.

After consolidation and cleaning, there were still areas with powdering paint and a generally uneven surface saturation overall. Guidera therefore decided to varnish the entire panel, with the dual purpose of consolidating and evenly saturating the paint layers. As such, she applied a 15% Laropal K80 varnish in 1:4 xylenes : Stoddard solvent over the entire panel; due to the fragile state of object, reversibility was not prioritized in this case. There is still much work to do on these panels: addressing the structural stability of the wood and metal elements, creating appropriate display and storage mounts, and of course treatment of the other panels in the group.

Guidera ended this illuminating presentation with resources for continuing education (listed below) and informed audience members they can eventually see these wagon panels in person in NMAH’s upcoming exhibition Entertainment Nation (date TBD).

Resources for Continuing Education:

William Henry Lane (aka Master Juba) was the first Black man to tour with a white minstrel group in the mid-19th century. His unique dance style and undeniable skill brought him fame in the U.S. and Europe. He is credited as a major contributor to tap, step, and jazz dancing.

Bert Williams & George Walker were a popular vaudeville duo who participated in minstrelsy, but elevated the Black characters and created opportunities within their own company for Black performers.

“Thoughts on Conserving Racist Materials in Libraries” by Michelle C. Smith


Reposted from: https://washingtonconservationguild.org/2021/04/29/meeting-summaries-preservation-confederate-monuments-era-black-lives-matter-facing-past-conservation-treatment-theatrical-wagon-panel/

Monday, December 30, 2019

SLIP CASTING AND GLAZING PORCELAIN


The Technology Project is a requirement within the Objects curriculum during the first year of the Garman Art Conservation Program at SUNY Buffalo State. Students are charged with teaching themselves a historical technology. I chose to learn how to slip cast porcelain bowls.

OBJECTIVE: 
To learn through experimentation how to slip cast and fire porcelain vessels and decorate with
underglaze and overglaze in the tradition of Jingdezhen ware.


MAKING THE MOLD:
First I chose a small container with straight sides that would be a good positive for a mold. Then, using
air dry clay, plexiglass, and cut aluminum sheeting, I made a square mold. The bowl (positive) was
placed face-down to the plexiglass base and sealed with the air dry clay. The walls were made of the
aluminum sheets and connected with the clay. Once the clay was dry, freshly mixed plaster (in a 1:1
mixture by volume) was poured into the mold so that each wall around the bowl positive was at least 2”
thick. The release agent used was petroleum jelly and in hindsight a mold soap would have been a
superior choice. The positive was difficult to remove from the mold and the texture of the petroleum
jelly was translated into the mold.

../Downloads/IMG_1455.JPG
Building a container to pour the plaster mold.


SLIP CASTING:
Once the mold was dry and cold to the touch (about 24 hours later), the positive was removed and the
first slip cast attempt was made. Commercial porcelain slip was poured into the mold to the brim. The
mold could be tipped slightly to ensure that porcelain was thickening in a wall around the plaster. 17
minutes later, the excess porcelain slip was poured out into a mason jar. This slip was used for later
castings. This first bowl took four days to separate from the mold and cracked upon removal. Because
of this unexpected outcome, three more molds were made and given over a week to completely dry
before attempting casting again. 


The second attempt for slip casting was much more successful. The porcelain slip was allowed to sit in
the mold for approximately 15 minutes before the excess was poured out. The bowls took close to 8
hours to separate from the mold and fell easily when flipped upside down. 


Once the bowls were taken out of the mold, the mold could be used again almost immediately after.
The more the mold was used, the shorter the drying and separating process was. After using the molds
10+ times, the porcelain reached desired wall thickness in 7-8 minutes and separated within 2 hours. 


Bowls were set out to air dry and texture was smoothed with a damp sponge. Handling the bowls too
much at this stage, or using a sponge that was too damp could break the very thin walls of porcelain.
The bowls that broke were shaped into plates.  

Porcelain slip in mold; edges setting:
../../Users/stephanieguidera/Downloads/Photos%20(6)/IMG_0


Smoothed greenware porcelain:
../Downloads/IMG_0951.JPG


UNDERGLAZING:
For the traditional underglazing, cobalt carbonate was mixed with three different vehicles and painted
on with a brush.  Much of my reading indicated water or oil was used, depending on the country of
manufacture, but no real recipe was found. One source indicated that green tea was used in China.


I tried the following, illustrated in the image below:

../Downloads/Photos%20(6)/IMG_0997.jpg
Left top and bottom bowls underglaze was cobalt carbonate in linseed oil, from the Dutch tradition. Middle top and bottom were cobalt carbonate in tap water, most commonly mentioned in all techniques and countries of origin.
Right top and bottom bowls were cobalt carbonate in green tea, from the Chinese tradition.


At this time, I also experimented with miscellaneous clear glaze recipes. 
Bowls B and C were dipped into two different recipes to test during this first firing.


FIRING:
../Downloads/Photos%20(6)/IMG_1068.jpg
Bowl after bisque firing; translucency of vitrified porcelain achieved
For the first firing, the kiln was programmed to reach cone 6, with a slow ramp time. This was
sufficient to vitrify the porcelain slip (note the transparent nature of the bowl after firing – image
to the right) and the cobalt glaze. The color glaze of the cobalt was exactly as predicted. The porcelain
did warp slightly, but this may be due to an inconsistency of kiln temperature or placement within
the kiln. The porcelain was bone dry when fired.


All methods of underglazing worked well. The linseed oil made a smoother line but did not flow as
finely as the water based vehicles. Tap water was used for the rest of the project. 

../Downloads/Photos%20(6)/IMG_1070.jpg../Downloads/Photos%20(6)/IMG_1064.jpg


GLAZING:
The first two clear glazes tried were taken from historical recipes for a clear glossy glaze. One was
very underfired (above photo, right bowl) as it did not vitrify at all. The other (above photo, left bowl)
was applied too thickly. 
The other piece learned from this first firing is that it would be better to bisque fire the underglazed
piece before dipping into the clear glaze. The water based, unbound cobalt carbonate smudged easily
when handled. After firing, these wares would be much easier to work with. Future firings were bisque
fired to cone 04 after underglaze design was painted on. 


Two final transparent feldspathic glazes were tried:
So Clear (Cone 6)1
Xing Glazes (Cone 6)2
32% Ferro Frit 3124
26% Feldspar 
19% Silica
13% Whiting
10% EPK
43% Feldspar 
12% EPK 
29% Silica 
10% Whiting 10
6% Dolomite
../Downloads/Photos%20(6)/IMG_1486.jpg
Dry ingredients, totaling 100 grams, were weighed and mixed in a plastic container. In a 1:1 volume
to mass ratio, tap water was gradually mixed into the container. This solution was passed through a
sieve multiple times until no clumps remained. 


The bisqued bowls were dipped in the glaze and smoothed. The glaze dried very quickly. 


Keeping the glaze agitated was important as the solution started to settle out very quickly.


The best glaze was the So Clear from John Britt. 
This glaze, when fired to cone 6, was glassy, transparent, thin and even. 


OVERGLAZING:
Finally, colorful overglazes were used to decorate the porcelain bowls. Historic pigments were ground,
mixed with spike oil, and painted onto the surface.

../Downloads/Photos%20(6)/IMG_1223.jpg../Downloads/Photos%20(6)/IMG_1235.jpg


REFERENCES: 1. Britt, John. The Complete Guide to Mid-Range Glazes: Glazing and Firing at Cones 4-7. Lark Crafts.
2014.
2. Wood, Nigel. Chinese Glazes Their Origins, Chemistry, and Recreation. A&C Black, London.
1999.


OTHER RESOURCES:
Clark, Kenneth. The Potter’s Manual Complete, practical-essential reference for all potters. Quarto
Publishing. 1983.
Conrad, John W. Ceramic Formulas: The Complete Compendium. Macmillan Publishing Co., Inc.
New York. 1973.
Zamek, Jeff. The Potter’s Studio Clay & Glaze Handbook. Quarry Books, Massachusetts. 2009.


ACKNOWLEDGEMENTS:
Allison Slenker whose support, knowledge, and spirit of exploration was instrumental in this process. 
Livy Balin for sharing her experience with the department kiln.
Jonathan Thornton for his guidance and encouragement throughout the process.
Dr. Aaron Shugar for information on historic glazes.

Wednesday, April 6, 2016

Concept album/painting in series

I love music.  There are few moments in my life in which there isn't music playing at least in the background.  It's a legitimate enjoyment, passion-fueling, inspiring love.  Only sometimes is it white noise or distraction, as I pay too much attention to the sounds for it to count as these things.  Now that I've proven beyond reasonable doubt that I love music....one of my favorite things an artist can do is release a concept album.  The idea that each song isn't just a beautiful mix of poetry, melody, harmony, rhythm, etc, but that each song fits into a specific theme, story, feeling, time.  Sgt. Pepper's, OK Computer, The Suburbs, Hazards of Love, everything by Sufjan Stevens, etc....AFFECTIVE.

This might be one of the reasons that I'm a serial painter.  I feed my ADHD side with small illustrations or commissioned pieces here and there, on the side, but I always have a series I'm working on.  I believe that series(es?), or albums, allow the artist to delve deeply into a concept and give it the time/attention it deserves while presenting an opportunity to achieve cohesion in style and narrative.  It is also an exercise in determination and evolution.  Some concepts fall flat after 2 pieces, while some could carry on for many albums/series.  Working in this way requires forethought and conceptual congruency - there has to be an answer to why.

My current series (see previous blogs for more) is coming along well.  Slowly, but well, and, you can't hurry love.  My mind usually works millions of steps before my body, but the physical process of painting always brings me back to the struggle and beauty I'm needing to communicate.  Which brings me to #5 of the series; finished:
5, 30"x30," oil on canvas


Face detail

Sunday, December 13, 2015

Adventures in Art Conservation

I have been working, for the past two years, on gaining experience and completing pre-requisites for an art conservation graduate program.  The road is long, difficult and quite narrow.  For someone like me, realizing after undergrad that this is the career for me, there are classes to take and experience (mostly unpaid) to obtain.  What this means for me, with my BA in studio art, is taking 20 credits of college level chemistry and completing the 400+ hours of practical experience in a conservation lab.  Conservation is a very small field; there isn't a huge demand for it, worldwide.  Most jobs, found in museums and cultural centers, are hard to find.  Instead of taking the for-profit school approach of who cares if they'll get a job, let's collect their tuition (ahem, art majors...), the few institutions in the US (yes, 3) with a graduate program accept a small number of students per year, taking only the best of the best.  This means competition is fierce.  And while I think this is a good way to weed out those who aren't truly serious, it's nonetheless, daunting for those of us who are.

So here I am, 15/20 credits in chemistry under my non-science-brain-ed belt, almost a year of interning at a fantastic regional conservation center (MACC), learning so much, applying most of it and after every shift interning, feeling validation that this is my path.  Most of the work I've been assisting with cannot be shared with the public as it comes from private and museum collections.  One thing I can write about, though, is compo (sometimes called ornamental composition).  Compo is basically a compound of different glues/adhesives and chalk that, when made correctly and molded, makes up most of the fine ornate frames we see today.  Here's a great example thanks to a Google image search:


This specific frame, here, is in need of some tlc restoration.  The white pieces you can see, where the gilding has chipped off, is the compo (the white is a gesso, layered over the compo, allowing gilding to adhere).  To restore this frame, one would take a mold of the pattern with a silicone mold, cook up some compo, allow it to set, and affix compo to frame, re-gesso, re-guild and, voila, good as new!

I needed a project that would satisfy an organic chemistry lab that I had missed.  This idea of compo was very interesting to me, so I decided to take a mold and try my hand.  The wonderful conservators (in the object lab at MACC, who have been graciously inserting knowledge into my brain for the past 9 months) told me everything I needed to know and were on hand just in case I blew anything up.


So here I am in the lab....

Two hot plates (living on the edge!)
Silicone mold
Initial mixing with the chalk
Compo in the mold

Final product and original mold -- SUCCESS!


It was pretty satisfying to have a really wonderfully successful product on my first try!  The only thing that I didn't do well was not casting the mold quickly enough.  The 2-part silicone mold making material set faster than I was ready for.  This is why the cracks appeared in the mold, and why they translated onto my piece of compo.  The compo piece remained quite flexible for almost a day before it hardened beyond any serious bending.  This is one of the wonderful characters of this mixture, it holds a pattern, yet, for hours afterward can be manipulated to fit the desired shape completely.  

Not only was this project an amazing hands-on learning experience, but my lab write up (including illustrating the chemical reactions and explaining a knowledge of the properties of the molecules and why they react the way they do together) got full marks!  Conservator-in-training success.  One more positive step on the way!!